
Inflating and deflating an inflatable stand-up paddleboard (SUP) may seem simple, but it’s crucial to do it correctly to ensure the board’s performance and longevity. The process requires some essential steps and basic knowledge to get the most out of your paddleboard experience.
Before inflating the paddleboard, it is essential to understand the board’s specifications, such as the recommended pressure and any specific instructions from the manufacturer. Familiarizing yourself with these details can prevent over-inflation and potential damage to the board. Additionally, having the appropriate pump and nozzle attachments is vital for a successful inflation process.
Deflating the paddleboard is just as important as inflating it, as improper deflation can lead to damage and difficulty when storing or transporting the board. With the right techniques and knowledge, paddleboard enthusiasts can ensure a hassle-free experience, leading to more enjoyable times out on the water.
Inflatable Paddle Board Basics
Inflatable paddle boards, also known as iSUPs, have become popular in recent years due to their convenience and ease of transportation. If you are new to paddle boarding or have recently purchased an inflatable paddle board, it is crucial to understand the basics of inflating and deflating your iSUP.
To inflate your paddle board, you will need a manual or electric pump, that comes with your iSUP package. Before starting, ensure that the board is on a clean, flat surface to prevent any damage to the board’s material. Double-check that the valve on your iSUP is closed to avoid air leakage during inflation.
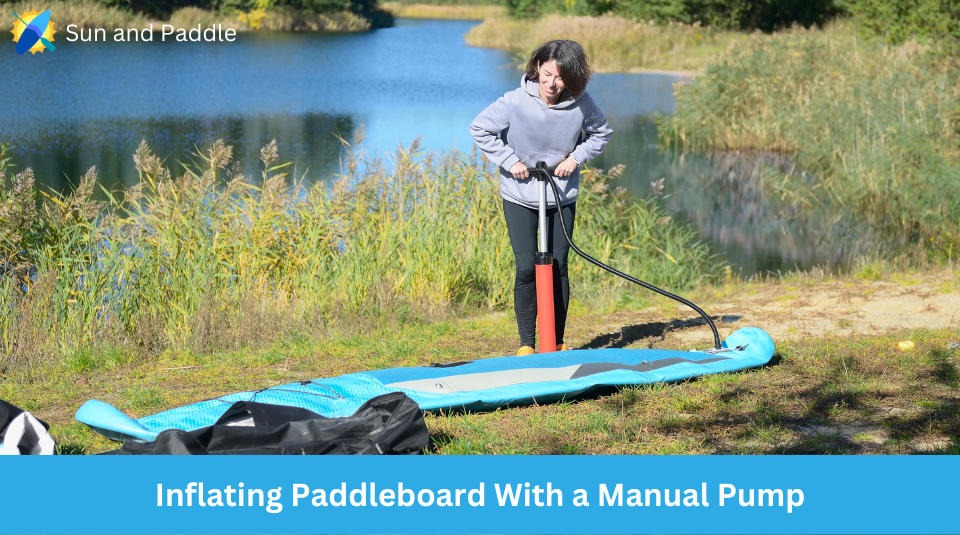
Begin inflating the board by attaching the pump hose to the valve. As you pump, the board will start to take shape and become more rigid. It is essential to monitor the pressure gauge on your pump as you inflate the iSUP to ensure you reach the recommended pressure level, usually between 12-15 PSI depending on the manufacturer’s guidelines. Do not overinflate the board, as it can cause damage to its structure.
While inflating, ensuring the paddleboard’s nose and tail are aligned correctly will be helpful. The nose should be pointed, while the tail should be flat. Make any necessary adjustments to achieve the appropriate form.
Once the iSUP has reached the desired pressure level, carefully remove the pump hose and ensure the valve is securely closed. Your paddle board is now ready for use. Before entering the water, attach the leash and ensure all other equipment, such as the paddle, is in good working order.
After a fun day on the water, it is time to deflate your paddle board. Start by locating the valve on your iSUP. Open the valve, which might require turning it to a specific position depending on its design. As soon as the valve opens, air will escape from the board. You can gently press on the board to help the air escape more quickly. However, be careful not to apply too much pressure, causing damage to your iSUP.
When most of the air is out and the board is relatively flat, begin folding. Start at the tail end of the paddle board, rolling it up towards the nose while ensuring that any remaining air is pushed out through the valve. Remember to close the valve once the board is fully deflated and rolled up. Finally, store your deflated paddle board, pump, and accessories in a suitable carrying bag to protect them and ensure their longevity.
By following these steps, you can confidently inflate and deflate your iSUP, making the most of your time on the water.
Inflation Process
Inflating a paddleboard is a straightforward process that requires a few essential tools. To begin, users need a pump, a hose, and a valve adapter. Most paddleboards come with a valve and air pump specifically designed for use with that board.
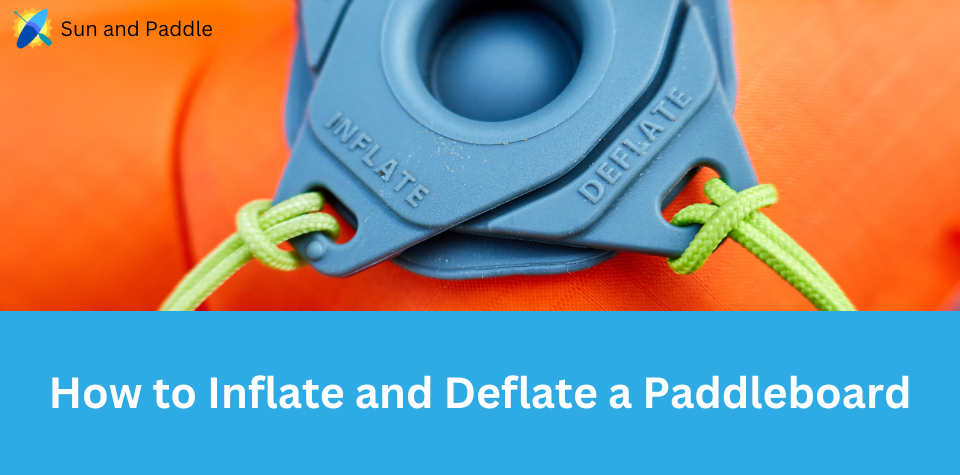
First, locate the paddleboard’s valve, usually positioned near the rear of the board. The valve pin must be open to allow air to enter. Connect the valve adapter to the board’s valve and ensure a secure connection.
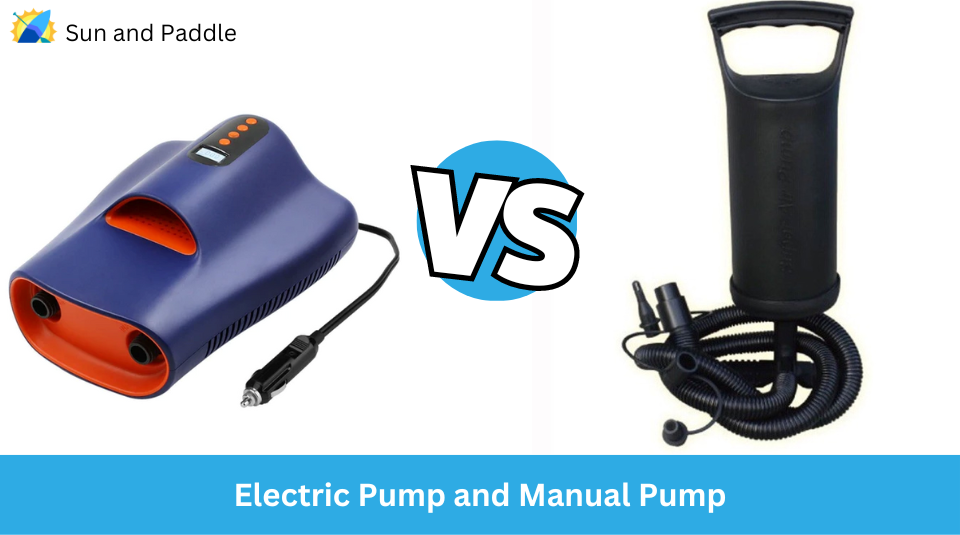
Choose an appropriate pump for inflation. There are electric pumps and manual pumps available. Electric pumps are faster and less labor-intensive, but manual pumps provide more control over the inflation process. Manual pumps can be single or double-action, with single-action pumps only inflating the board on the downward stroke, while double-action pumps do so on both upward and downward strokes.
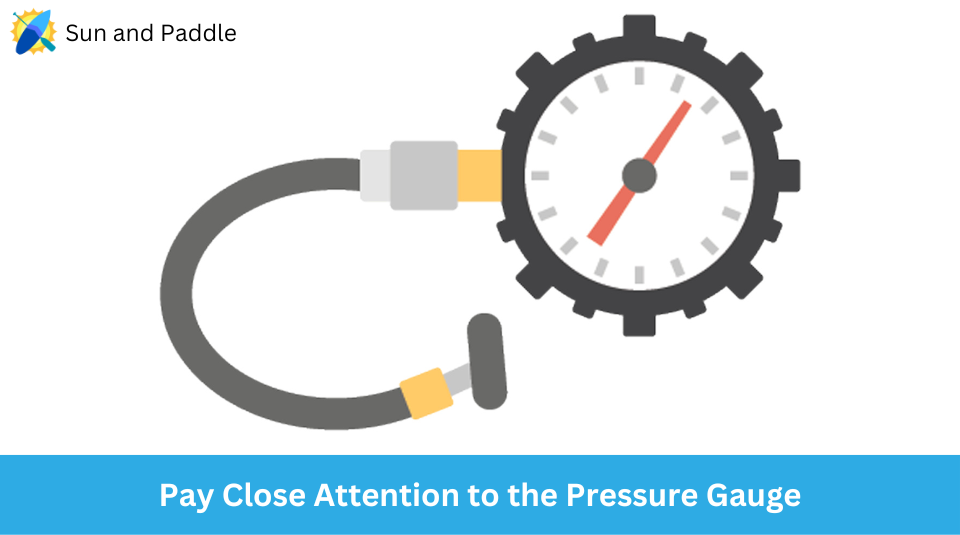
Attach the hose to the pump’s nozzle and the valve adapter. Double-check connections to prevent air from escaping or damage to the valve. Begin inflating the paddleboard through the pump’s selected mechanism. Users can switch between single and double-action settings on manual pumps to match their comfort level. Hold the pump steady and keep an eye on the PSI gauge.
Paddleboards typically require an inflation range between 12-15 PSI. Inflate the board gradually and avoid exceeding the specified PSI limit for safety and to lengthen the board’s lifespan. The PSI gauge, commonly found on the pump, displays the current air pressure within the board.
Disconnect the hose from the valve once the paddleboard reaches the desired PSI. Immediately close the valve pin to prevent air from escaping. Finally, secure the valve cap to remove water and debris during use.
Remember to maintain a neutral, clear, and confident demeanor throughout the inflation process. It is essential to be knowledgeable and precise when handling paddleboard equipment.
Proper Inflation Tips
Inflating a paddleboard correctly is crucial for its performance and longevity. Here are a few tips to ensure proper inflation and a successful paddling experience.
First, identify the recommended PSI for your specific paddleboard. This information can usually be found in the user manual or on the board itself. The pressure range varies depending on the board type and brand but generally falls between 12 to 15 PSI.
Before inflating:
- Ensure that the valve is closed and secured.
- Attach a high-pressure pump, preferably one with a pressure gauge, to monitor the air pressure as you inflate.
- Start by manually pumping air into the paddleboard.
Maintaining a consistent pumping rhythm is important to make the process more efficient and effortless.
As you approach the recommended PSI, the board will become stiffer and more challenging to inflate. Pay close attention to the pressure gauge as you near the desired air pressure. Overinflating can damage the board or reduce its lifespan, so it’s crucial not to exceed the manufacturer’s recommendation.
Once the board reaches the recommended air pressure, remove the pump, and close the valve tightly to prevent any air leakage. Your paddleboard is now ready for use.
Remember that air pressure can fluctuate depending on temperature changes and altitude. It is advisable to check the PSI periodically throughout the day and make adjustments as necessary. Monitor the board closely During very hot conditions and consider slightly deflating it to accommodate heat-induced pressure changes.
Remember that proper inflation contributes not only to the paddleboard’s performance but also your overall paddling experience. Always adhere to the manufacturer’s guidelines for the suggested air pressure, and enjoy safe and enjoyable paddling sessions.
SUP Pump Options
SUP pumps, crucial for inflating Stand Up Paddleboards (SUPs), come in various forms, including electric pumps, SUP pump adaptors, and hand pumps. Electric SUP pumps are a convenient and popular choice for inflating an iSUP quickly, typically in under 15 minutes, providing a more enjoyable and less strenuous experience compared to the manual alternatives. These pumps, mostly priced under $150, are usually more efficient and portable than manual pumps, even capable of deflating the board for easy packing. SUP pump adaptors are small devices that bridge the compatibility gap between the SUP’s valve and the pump’s valve. These come in various sizes and materials, including metal alloy, durable plastic, and stainless steel, with the latter being most durable, particularly in saltwater environments. The ease of use and durability of the adaptor largely depends on the user’s needs and preferences. Lastly, hand pumps offer the advantage of not needing batteries or an electrical connection. They are portable and practical, allowing you to inflate your SUP upon reaching the water and even deflate the board when it’s time to pack up. Choosing the right SUP pump can greatly enhance your paddleboarding experience.
Deflation Process
Deflating a paddleboard is essential for transportation and storage. The process is straightforward, but it is crucial to follow the steps properly to avoid damaging the board or its components.
First, remove the board from the water and ensure that it is free of any dirt or debris. Lay the board on a flat surface with the fin facing upwards. The deflation process should commence once the board is clean and the surface is stable.
Before deflating:
- Locate the valve cap on the board, usually found near the tail end.
- Twist and remove the valve cap to reveal the inflation/deflation valve.
- Press down on the center pin and turn it 90 degrees to lock it in the open position. This action will release the air from the board in a controlled manner.
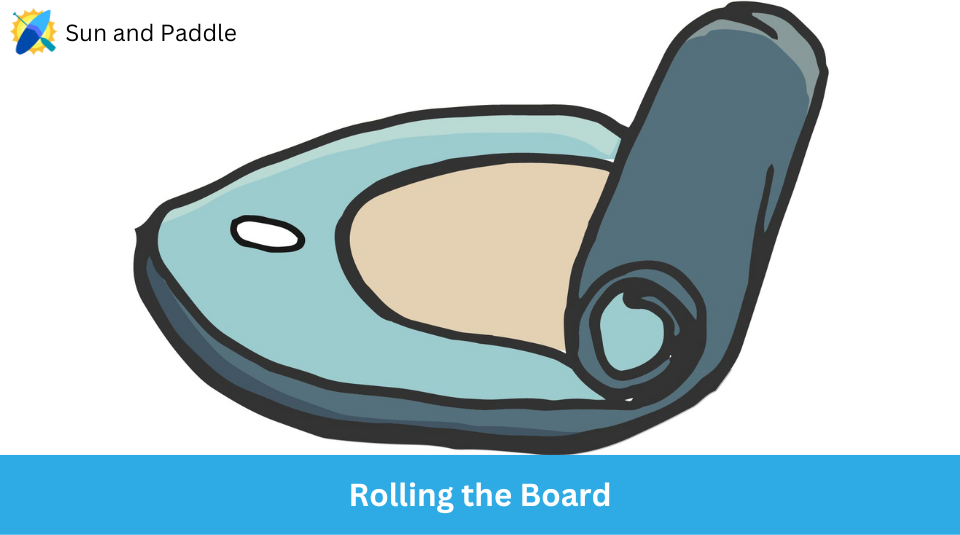
As the air escapes, start rolling the board from the nose (front) towards the valve at the tail. Rolling the board helps to push the remaining air out of the valve in an efficient manner. Remember to roll the board gently and evenly, avoiding any harsh folding or bending. Keep an eye on the board’s fin during this process, as folding it or applying too much pressure can damage it.
Once most of the air has been released, close the valve by pressing the center pin and turning it 90 degrees to its original position. This step is crucial in ensuring that no air enters the board when the valve cap is replaced. With the valve securely closed, screw the valve cap back onto the valve tightly.
The deflation process is now complete. While there are some minor downsides to deflating and inflating a paddleboard frequently, such as longer setup times and increased wear on the board, it is necessary for transportation and storage. By following these steps, the board will be safely and effectively rolled up, taking up minimal space and ready for its next adventure.
Deflation Tips and Techniques
Deflating a paddleboard properly is essential to maintaining its durability and longevity. Here are some tips and techniques to follow when deflating your paddleboard.
First, remove any debris or sand from the board’s surface. Rinse the board with fresh water to get rid of saltwater, dirt, or sand trapped. It’s essential to clean the board before deflating to prevent damage both during the process and when storing it.
Next, check the paddleboard’s fins and remove them if possible. Some boards have removable fins, while others do not. If the fins are removable, carefully take them off to avoid damaging them during deflation and storage. Remember to rinse the fins with fresh water as well.
Now it’s time to deflate the board. Locate the valve and use a valve wrench, if available, to open it. The air should begin to escape from the board. To speed up deflation, you can gently press down on the board, starting from the nose to the tail. Pressing the board from nose to tail will help release the air more efficiently and avoid creating air pockets inside the board.
While the board is deflating, you can use a strap to bind the paddleboard, enabling it to roll up more compactly. Putting a strap around the board as it deflates will also help push out any remaining air inside.
Once the board is fully deflated, double-check to ensure no air is trapped inside. At this point, you should store the board in a protective bag or case, fins, and other accessories. Keeping your board dry and away from direct sunlight when storing is crucial to prevent damage and maintain its condition.
Transport and Storage
Inflatable paddleboards are a popular choice among outdoor enthusiasts due to their portability and ease of storage. When transporting and storing your paddleboard, you can follow a few simple steps to ensure its longevity and maintain its performance.
Before packing your paddleboard, make sure it is completely dry. Keep the board on a flat surface, allowing any residual water to evaporate. It is crucial to avoid any moisture build-up, as it can lead to mold or mildew growth, which may deteriorate the board over time. While waiting for the board to dry, you can disassemble and keep the paddle aside.
Once the paddleboard is dry, deflate it by releasing the air valve. Gradually roll up the paddleboard from the nose (top) to the tail (bottom), expelling any remaining air. Ensure that the fin side is facing outward while rolling up the board, as it helps protect the fin from any damage during transportation.
A suitable carry bag or backpack, often provided by the manufacturer, can be used for transporting and storing the rolled-up paddleboard. Secure the paddleboard with straps or buckles within the bag, which helps keep it in place and prevents it from unrolling. Next, place the disassembled paddle into the designated side pocket or strap it alongside the bag.
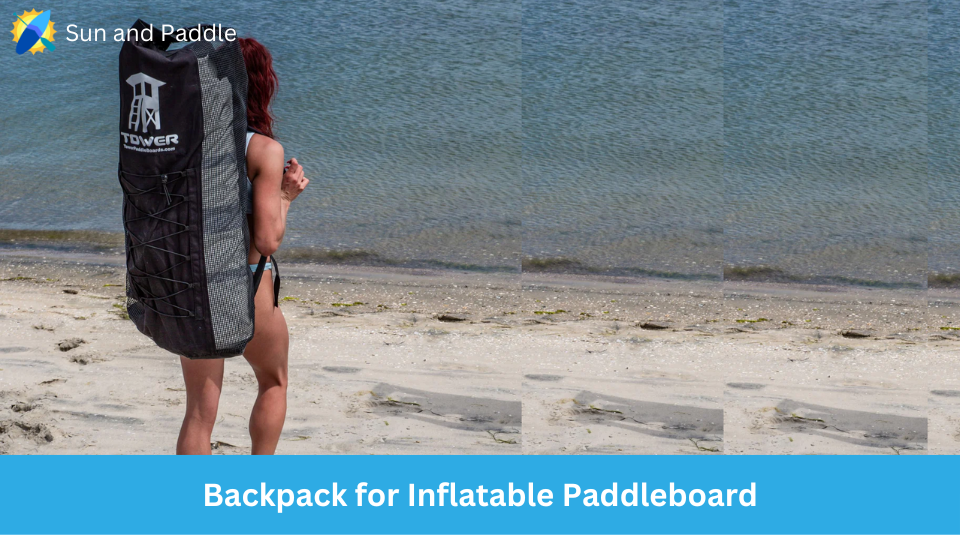
When it comes to storage, ensure to keep the paddleboard and its accessories in a cool, dry place, away from direct sunlight and extreme temperatures. Prolonged exposure to harsh weather conditions may affect the structural integrity of the paddleboard. Remember to store the paddleboard in its bag or backpack, as it offers additional protection and makes it convenient for future transportation.
By following these guidelines, you can effectively transport and store your inflatable paddleboard, ensuring its durability and high performance for years.
Cleaning and Maintenance
Proper cleaning and maintenance are essential to keeping your paddleboard in tip-top shape. Regular care can help prevent damage to the board, valves, and other components. Here are some simple steps to keep your paddleboard clean and well-maintained.
First, it’s important to clean the board after each use. Salt, dirt, and other debris can accumulate on the surface, which can be damaging over time. Use a mild soap and water solution with a soft brush or sponge to gently clean the board. Rinse it thoroughly with fresh water, particularly if used in salt water, as the salt can be corrosive.
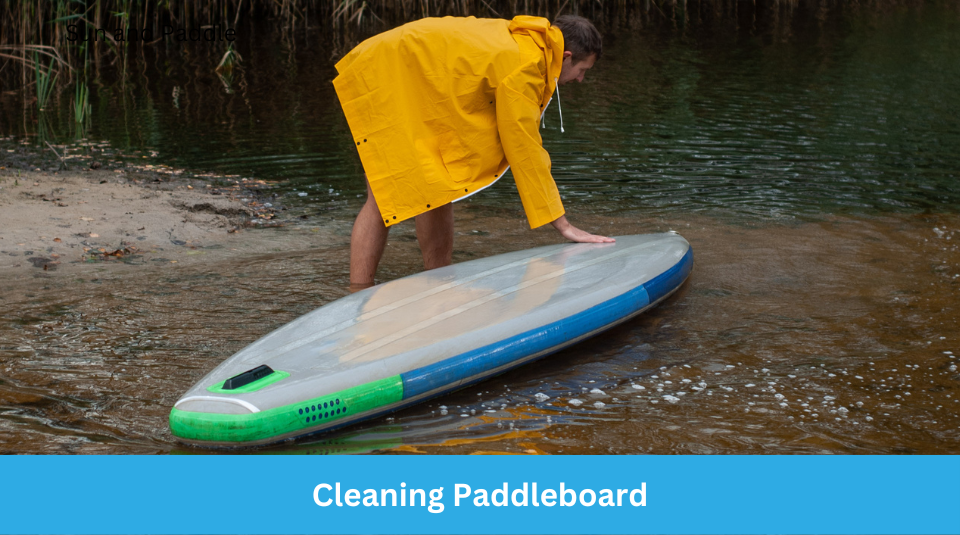
Next, pay special attention to the valve stem and the surrounding area as you clean the board. The valve stem is prone to collecting dirt and debris, which can cause leakage if not properly cleaned. Gently brush and rinse the valve stem, ensuring that it is free of any dirt, salt, or other particles.
Remember to always dry your paddleboard completely before storing it. Store the board in a cool, dry place away from direct sunlight to prevent UV damage. If possible, store the paddleboard inflated to maintain its shape.
Always use the appropriate pump and hose to inflate and deflate your paddleboard. Electric pumps can be a convenient option as they typically inflate the board quickly and easily. When attaching the pump hose to the inflatable paddleboard valves, connect it correctly by screwing it counterclockwise onto the valves. Following the manufacturer’s instructions regarding the correct inflation pressure is crucial to avoid any damage.
Similarly, when deflating your paddleboard, ensure that you release the air in a controlled manner so as not to damage the valves or other components. Gently unscrew the valve counterclockwise to release the air, and do not forcefully push or pull on the pump hose while doing so.
By following these simple guidelines, your paddleboard will be clean and well-maintained, ensuring that you can continue to enjoy your paddleboarding adventures for years to come.
Additional Considerations
Several factors should be considered in addition to the actual process when inflating and deflating an inflatable paddle board (SUP). These aspects include the use of proper equipment, safety precautions, storage, and understanding of the provided warranty.
It is essential to have the correct SUP pump for inflation. Typically, inflatable paddle boards come with a hand pump designed for that specific board. Nevertheless, an electric SUP pump can be used if a hand pump is unavailable or the user prefers an easier method. When inflating the SUP board, make sure to monitor the PSI gauge to ensure the proper pressure level is achieved. Most SUP boards require around 15-25 PSI for optimal performance.
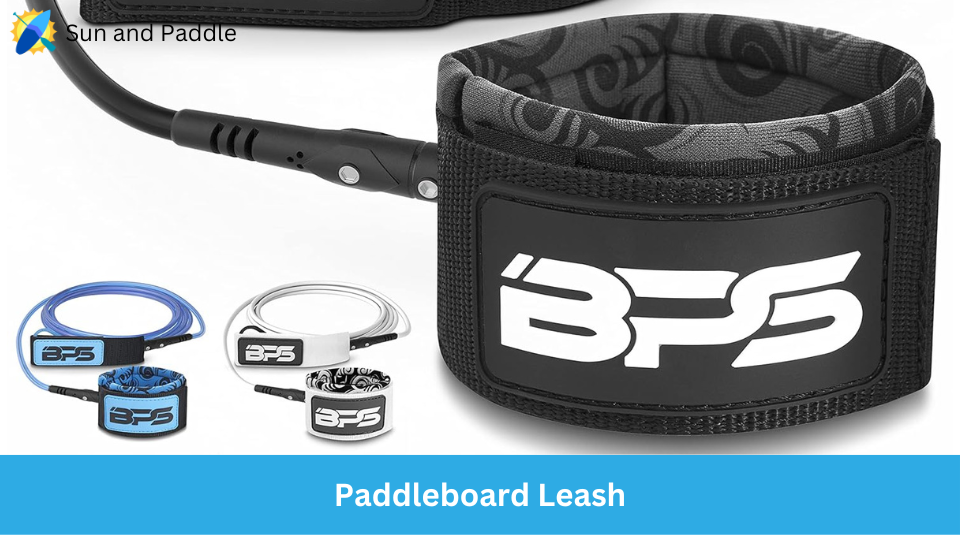
While inflating, the user should also ensure that their paddle board is equipped with a leash. A leash is crucial for the paddler’s safety, as it attaches them to the board and prevents them from getting separated if they fall. Moreover, inspecting the board for any visible damage or defects before each use is essential. This helps maintain the board’s longevity and keeps the user safe during their paddleboarding adventures.
Understanding the warranty provided with an inflatable paddle board is also important. Most SUP manufacturers offer a warranty on their products, covering common issues such as material defects or flaws in workmanship. Familiarizing oneself with the warranty’s terms and conditions is highly recommended, as this allows the user to address any concerns timely.
Finally, proper storage is key in maintaining the paddle board’s lifespan. Deflating the SUP board is necessary before storing it, and then it can be rolled or folded according to the manufacturer’s instructions. It is essential to store the deflated board in a dry and cool area, away from direct sunlight or extreme temperatures.
By considering these additional elements when inflating and deflating a paddle board, paddlers can enjoy a safe and enjoyable experience while prolonging the life of their inflatable SUP board.
Summary for Inflating a Deflating an Inflatable Paddleboard
Inflating and deflating an inflatable paddleboard is a simple process that can be mastered quickly. Following the proper steps ensures the longevity of your paddleboard while providing you with a safe and enjoyable experience on the water.
It is essential for users always to use the appropriate pump, whether it is a manual or electric pump, as this will aid in the efficient inflation of the paddleboard. Moreover, inflating the board to the manufacturer’s recommended PSI is crucial for maintaining its structural integrity and optimal performance.
When deflating a paddleboard, users should start by releasing the air valve and gently pressing on the board to expel any remaining air. It is essential to carefully fold and roll the board to prevent any damage, especially to the fins and any other fragile components.
Ultimately, proper maintenance and care, including rinsing the paddleboard with fresh water and storing it in a cool, dry space, will prolong its lifespan and ensure enjoyable outings for years to come. By following these simple tips and guidelines, paddleboard enthusiasts can confidently tackle the process of inflating and deflating their boards, ensuring safety and maximum enjoyment during their water-based adventures.
Frequently Asked Questions
What is the proper technique for folding an inflatable SUP?
When folding an inflatable SUP, ensure it is fully deflated and clean. Start by rolling it from the tail to the nose, keeping the fin boxes flat against the board. Ensure the folds are straight and even, applying even pressure while rolling. If necessary, use a strap or bungee to secure it.
How do you deflate a Fbsport paddle board effectively?
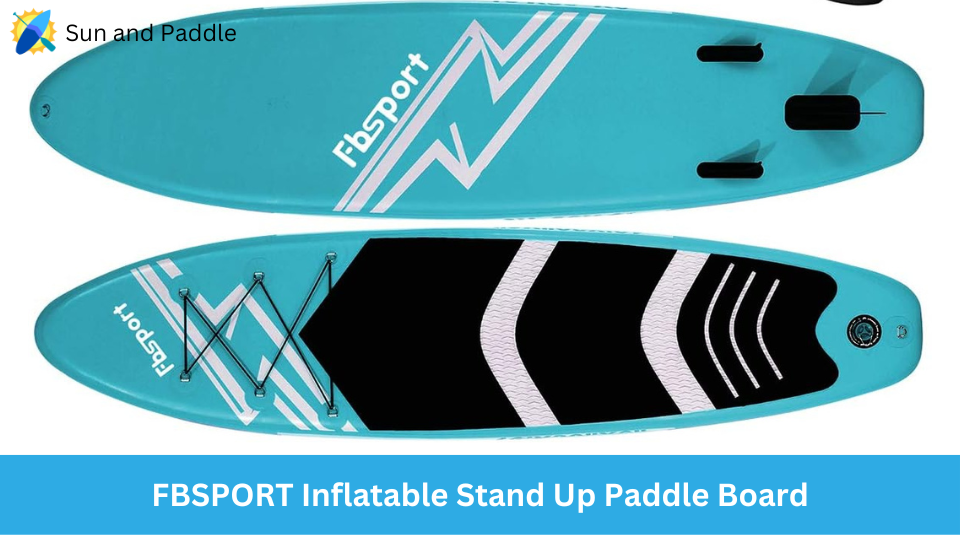
To deflate a Fbsport paddle board effectively, first remove the fin and then open the valve cap. Turn the valve pin counterclockwise to release air. Gently press down on the board to expel the air. Once fully deflated, fold or roll the board before storing it.
What is the process for deflating a Body Glove Performer 11 Paddle board?
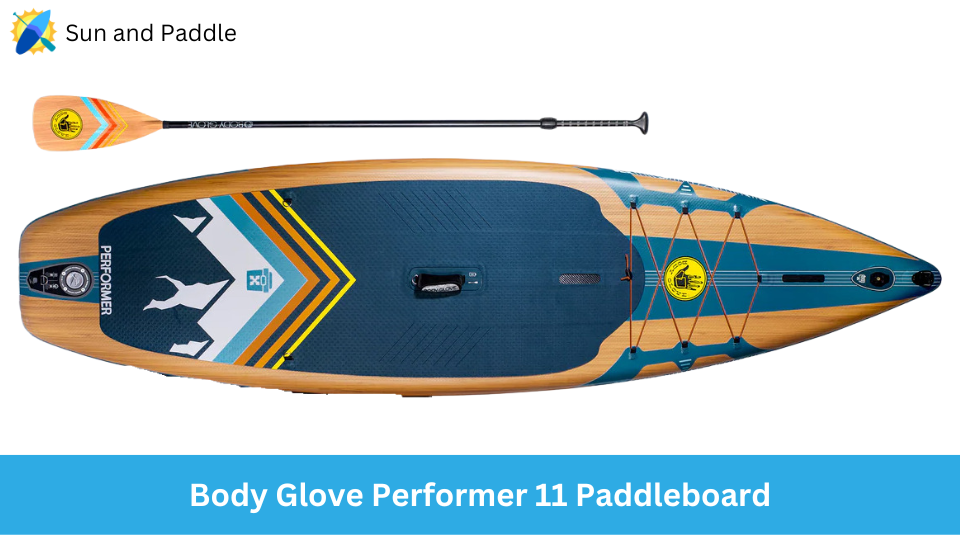
For deflating a Body Glove Performer 11 Paddleboard:
- Locate the air valve, remove the cap, and turn the valve pin counterclockwise to release the air.
- Gently press on the board, working from the tail end to the nose, to squeeze out the remaining air.
- After deflating, fold or roll the board for storage.
How much time does it usually take to inflate a stand-up paddle board?
Inflating a stand-up paddle board can take 5 to 15 minutes, depending on the type of pump used. A manual pump typically takes around 10 to 15 minutes, while an electric pump can inflate a board in as little as 5 minutes.
Do you need the pin up or down when inflating a paddle board?
When inflating a paddle board, the pin should be up. This will allow air to flow into the board and prevent it from escaping while you pump. Ensure the valve is locked in place before you begin inflating.
What are some tips for getting air out of an inflatable SUP?
To effectively get the air out of an inflatable SUP, follow these tips:
- Open the valve cap and turn the pin counterclockwise to release air.
- Gently press down on the board from the tail to the nose, working methodically to push out the air.
- Fold or roll the board tightly to ensure all air is expelled.
- Store the board in a cool and dry place to avoid damage and moisture buildup.